Lower contrast with an inverted s-curve. The S curve is popular due to its simplicity as the name really explains it all.
Photoshop Curves Tool 6 Techniques Every Photographer Must Know Techradar
It looks something like this.
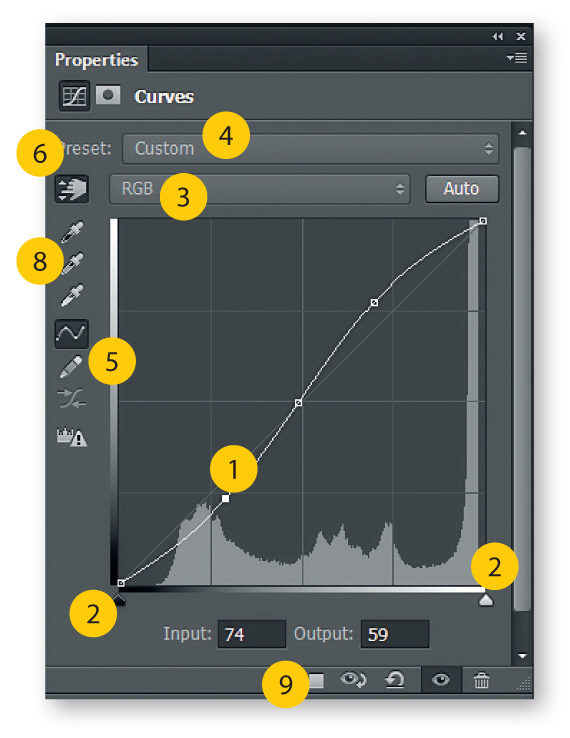
. Create an s-curve to add contrast. Curves is best applied as an Adjustment Layer. Editing the Shot.
Here is the original image we will use to show what can be achieved using the S Curve feature. There are no hard and fast photo editing rules on what a tone curve should look like but the most common curve to use is the S curve. What does the curves tool do to a photo.
That is how the line becomes a curve. To increase contrast using the Tone Curve you want to create an S-shape. In this Photo Editing tutorial well look at the similarities between two of Photoshops most important image editing tools - the Levels and Curves adjustments.
But you dont always have light. For this method youre aiming to create an S-shaped curve with your diagonal line. Add a Curves Adjustment Layer as in fig below Layers New Adjustment Layer Curves.
A little does a lot. When used in just a portion of the photo its imperative it targets a key part of the primary subject. Open your image in Photoshop.
A Landscape Photography Composition Technique. If your photo is in CMYK you will see cyan magenta yellow and black channel. Go to the Layers Panel click the Create Adjustment Layer icon at the bottom and choose.
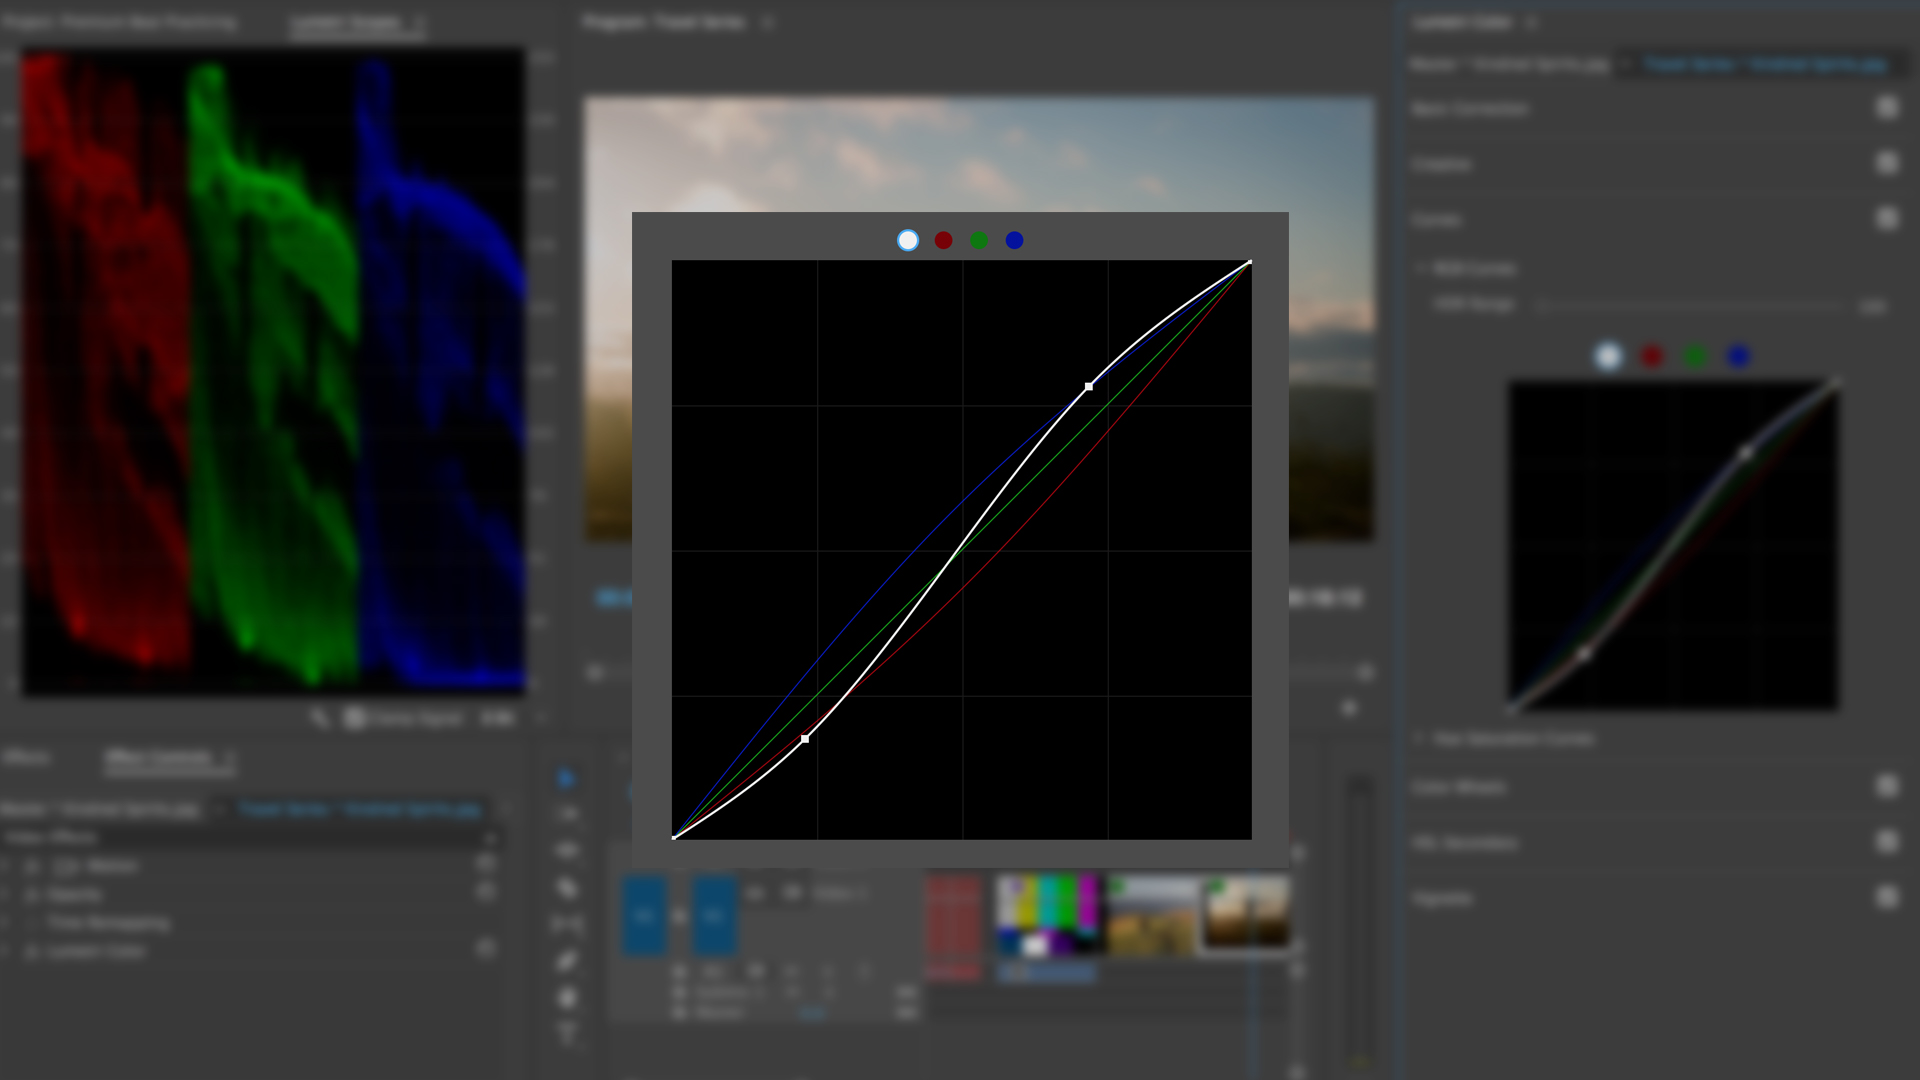
Dragging the Red curve up will increase the intensity of Red while dragging it down will add Cyan. You can do create adjustments like a cross-processed or solarized look using curves. Now on the right hand side of the histogram highlightswhites bring that up slightly.
Ad Enhance your photos with filters layers graphics text overlays. The classic way to use tone curves in most image editing software whether its Lightroom or Photoshop or any other is to increase the contrast of the entire image with a classic S-curve. The highlights become lighter and the shadows become darker.
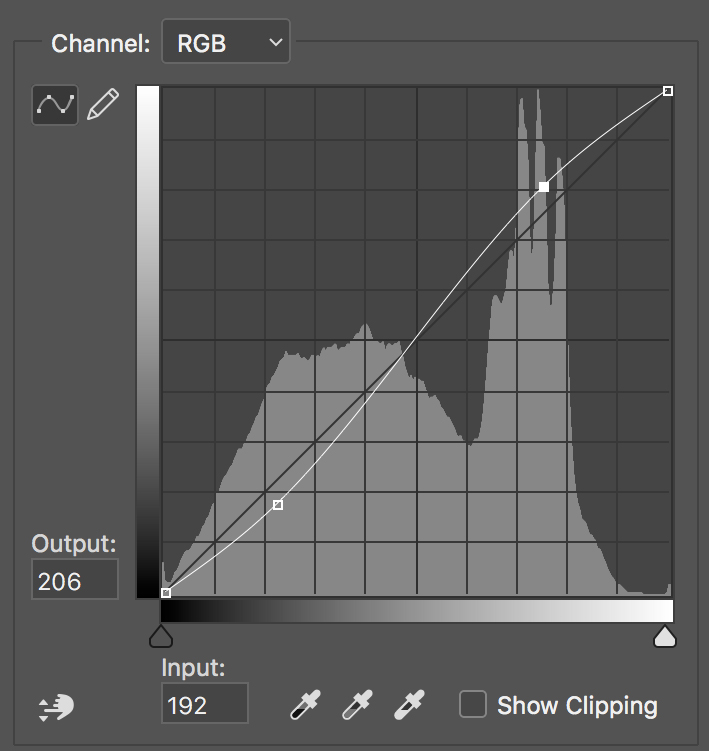
You can use the Tone Curve on individual channels to edit different tonal areas in the image. Accomplish this by adding two points to your lineone at the lower end of the line and the other at the upper end. When you drag the upper portion of the line further up and the bottom portion of the line further down it forms an S curve and creates a contrast in the picture.
Choose the channel you want to edit from the drop-down menu. When hidden in and amongst chaos its beauty and fluidity go unnoticed. The curve curves up on the right side of the histogram where the brights live and it curves down on the left side of the histogram where the darks live.
A big hitter with your curves what is known as the S curve. The second and the most effective way is to use curves as an adjustment layer. Curves Tool also helps you to modify the Primary Colors as well with different curves available for different colors.
The highlights point should go up and the shadows point should go down. For contrast and punch in a photo heres how to set the S curve. The S curve neednt encompass full-image real estate.
Ad Make your portraits look amazing in under a minute. Since the shape of the leading line looks like the letter S or part of the letter S it is called the S Curve. At first glance the Curves adjustment may seem less like an image editing tool and more like something only a scientist would know what to do with especially when compared with the much simpler Levels.
So when you dont have light the next best thing to look for is a lovely S-Curve leading into your image. Try It Now For Free. You can download this image so you can follow the tutorial.
What is S curve in editing. Compare the images that accompany this weeks tip. The former method applies the curve directly to the image making it a destructive form of editing ie you cannot modify it later unless you have converted it into a smart object.
To create an S-curve tone curve simply create at least two points one in the highlights and one in the shadows. This curve excels at raising image contrast. I first converted both images to black and white using Silver Efex Pro 2.
One way of doing it is by going to the menu Image-Adjustments-Curves. Ad Remove Backgrounds And Add Shadows To Your Photos With Canva Pro. Light is one of the most important elements in landscape photography.
To do the S curve towards the left-hand of the curves in the shadowsblacks of the histogram pull the line down slightly. Download the greyscale image and the colorwheel below and play around on them using the curves tool. Used by over 2 million brands designers and creators.
The S curve. This allows it to stand out and be more readily noticed. Now well emphasize the storm and the bad weather by tinting the picture towards cooler tonesblue and turquoise.
By raising the end of the curve in the shadows we give the picture a matte vintage look. Heres how this photo looks after its been prepared for Curves editing. The S curve is a type of leading line which when used correctly can improve the composition of the image helping to create strong images that can keep viewers engaged for a longer period of time.
But the photos are usually RGB so youll see red green and blue. Its a public parking lot that is free if you are traveling by foot. The final image was edited in Aperture with the help of Niks Silver Efex Pro 2.
Create 3 points on the curve at the quarter half and three quarter marks. This S-curve makes the brights brighter and the darks darker. Dragging the Green curve up will increase the intensity of Green while dragging it down will add Magenta.
Now its your turn to give curves a try. The green circle on the map below is the location where the S Curve photo was taken. Name the layer Curves 1 and click OK.
A Beginner S Guide To Color Curves For Powerful Correction

Pin On Be A Lightroom Pro

Understanding Curves Tool In Photo Editing Lightx App

Confused By The Tone Curves This Is How They Work And How To Use Them Diy Photography

7 Tone Curve Tips That Will Make Your Editing Better Fstoppers

Coffeeshop Editing 101 S Curve Pop Ps Pse Action And Unwrapped Tutorial Pse Actions Photography Help Photo Fix

The Coffeeshop Blog Coffeeshop Editing 101 S Curve Pop Ps Pse Action And Unwrapped Tutorial
A Beginner S Guide To Color Curves For Powerful Correction
0 comments
Post a Comment